Using Web Sockets / WebSockets can be very helpful in a lot of nowadays applications/websites. The enormous flow of notifications, data, info, news and push notifications will be best handled by one of two things, either Web Sockets or SSE (Server Sent Events – Will speak about it in a later post). In this article, we will speak about using Angular with Web Sockets and how to implement it with a simple chat application.
First things First
What are we gonna use?
As always, we will be creating a new Angular application using ng new
Let’s say: `$ ng new AngularWebSockets`
Worst UI Every
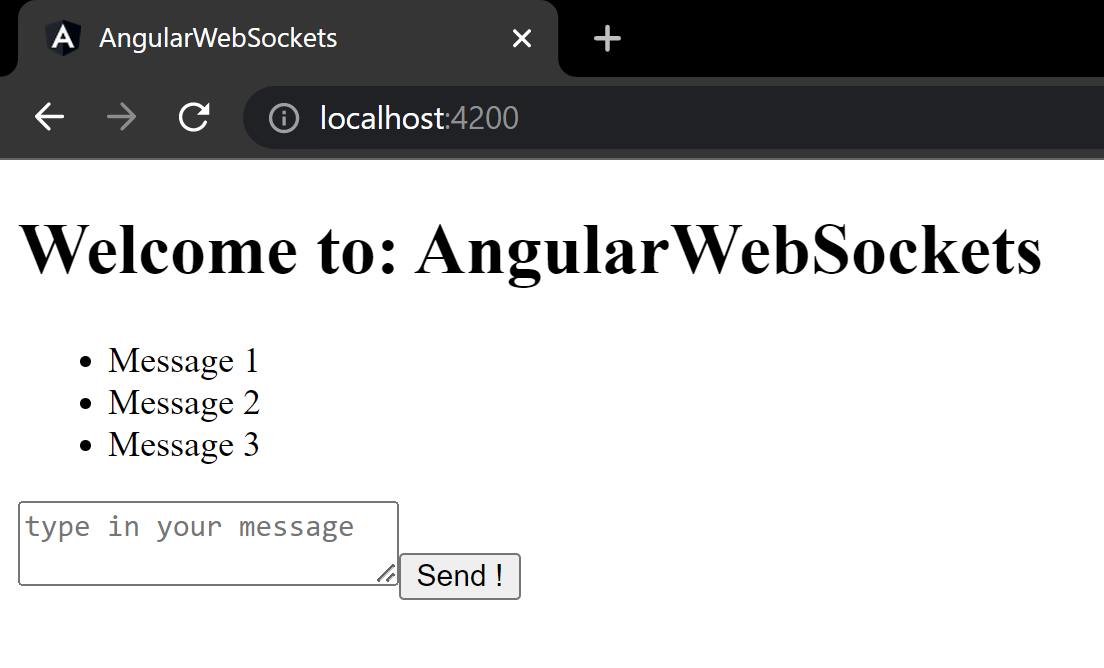
Let’s create the worst UI ever, we will have a chat application with a <ul> element, messages will be in the <li> in it, a <textarea> to type in the message and a <button> to send the message.
Let’s see how does this look like:
And the code should be like this:
<h1>
  Welcome to: {{title}}
</h1>
<ul>
  <li>Message 1</li>
  <li>Message 2</li>
  <li>Message 3</li>
</ul>
<textarea placeholder="type in your message"></textarea>
<button>Send !</button>
Beautiful !! No?
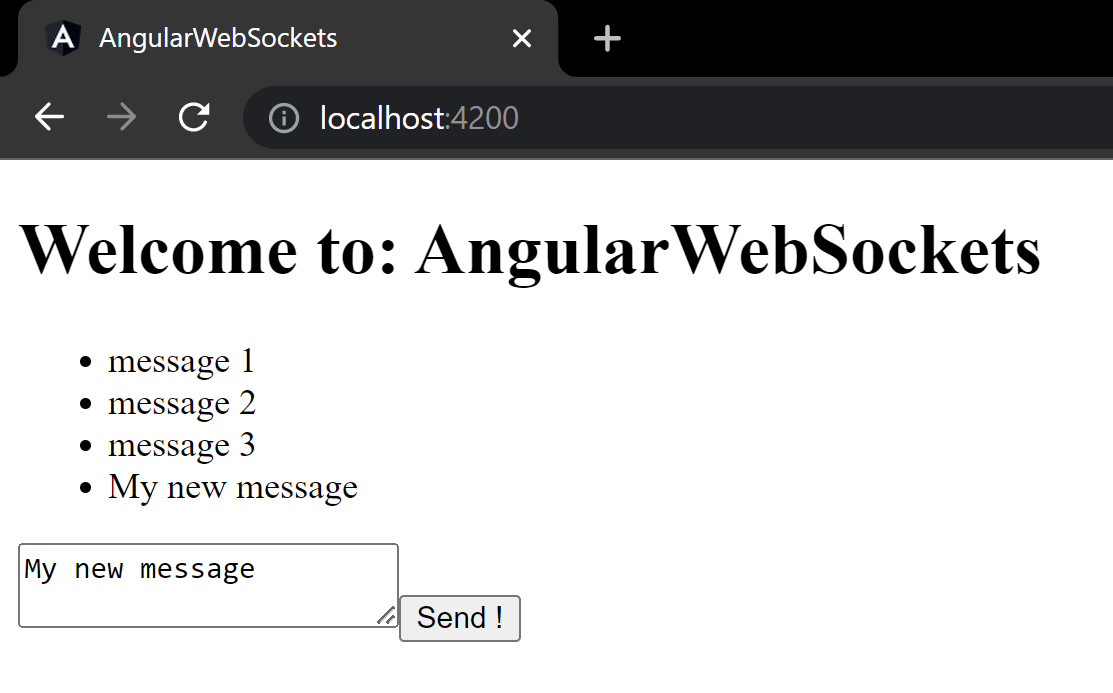
Now, Let’s turn our <li> to a list/array of messages and loop over it using *ngFor, and use our textarea and our send button to add to this array.
How?
First, we need to add FormsModule to our app.module.ts
import { NgModule } from '@angular/core';
import { BrowserModule } from '@angular/platform-browser';

import { AppRoutingModule } from './app-routing.module';
import { AppComponent } from './app.component';
import { FormsModule } from '@angular/forms';

@NgModule({
  declarations: [
    AppComponent
  ],
  imports: [
    BrowserModule,
    AppRoutingModule,
    FormsModule
  ],
  providers: [],
  bootstrap: [AppComponent]
})
export class AppModule { }
Then, let’s see our app.component.html and app.component.ts
<h1>
  Welcome to: {{title}}
</h1>
<ul>
  <li *ngFor="let message of messages">{{message}}</li>
</ul>
<textarea placeholder="type in your message" [(ngModel)]="myMessage"></textarea>
<button (click)="send(myMessage)">Send !</button>
and our app.component.ts
import { Component } from '@angular/core';

@Component({
  selector: 'app-root',
  templateUrl: './app.component.html',
  styleUrls: ['./app.component.css']
})
export class AppComponent {
  title = 'AngularWebSockets';
  myMessage: string = '';
  messages: string[] = ['message 1', 'message 2', 'message 3']

  constructor() {

  }

  send(message: string) {
    this.messages.push(message);
  }
}
Resulting HTML:

Integrating with Web Sockets
Now, we will need to use ExpressJS
In a nutshell
ExpressJS is a NodeJS server, pretty much like any web server, used for backend development, but written in JavaScript.
Let’s create a backend app using Node and ExpressJS
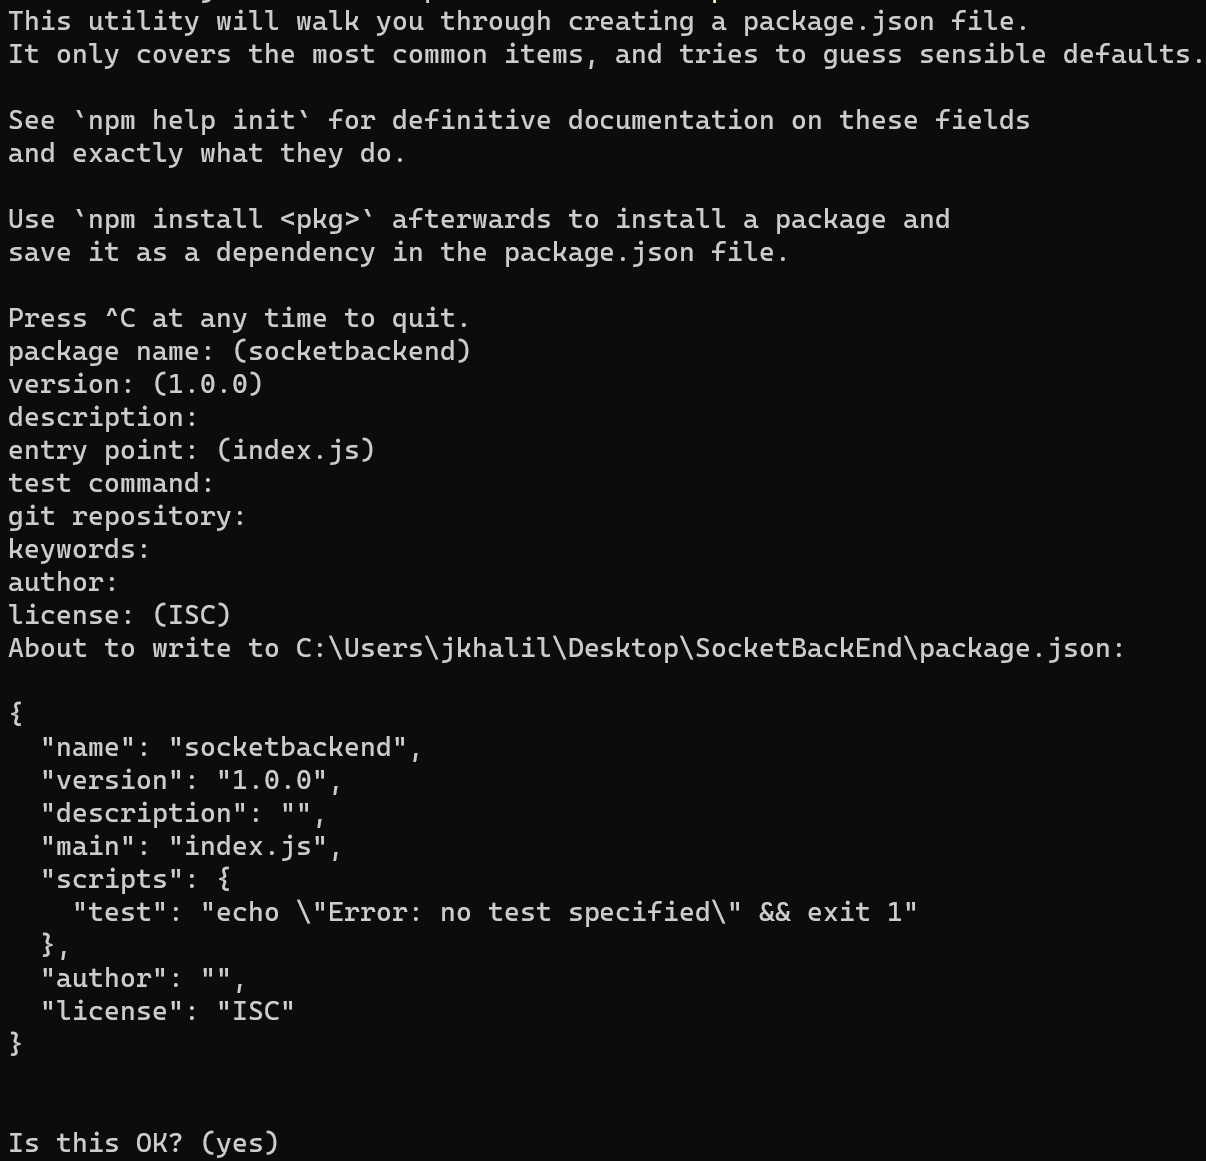
Create a new folder (Call it SocketBackEnd), open a terminal there and run `$ npm init`
Hit Enter till it’s done.
Now, let’s install ExpressJS and SocketIO
Run:
- npm install express@4
- npm install socket.io
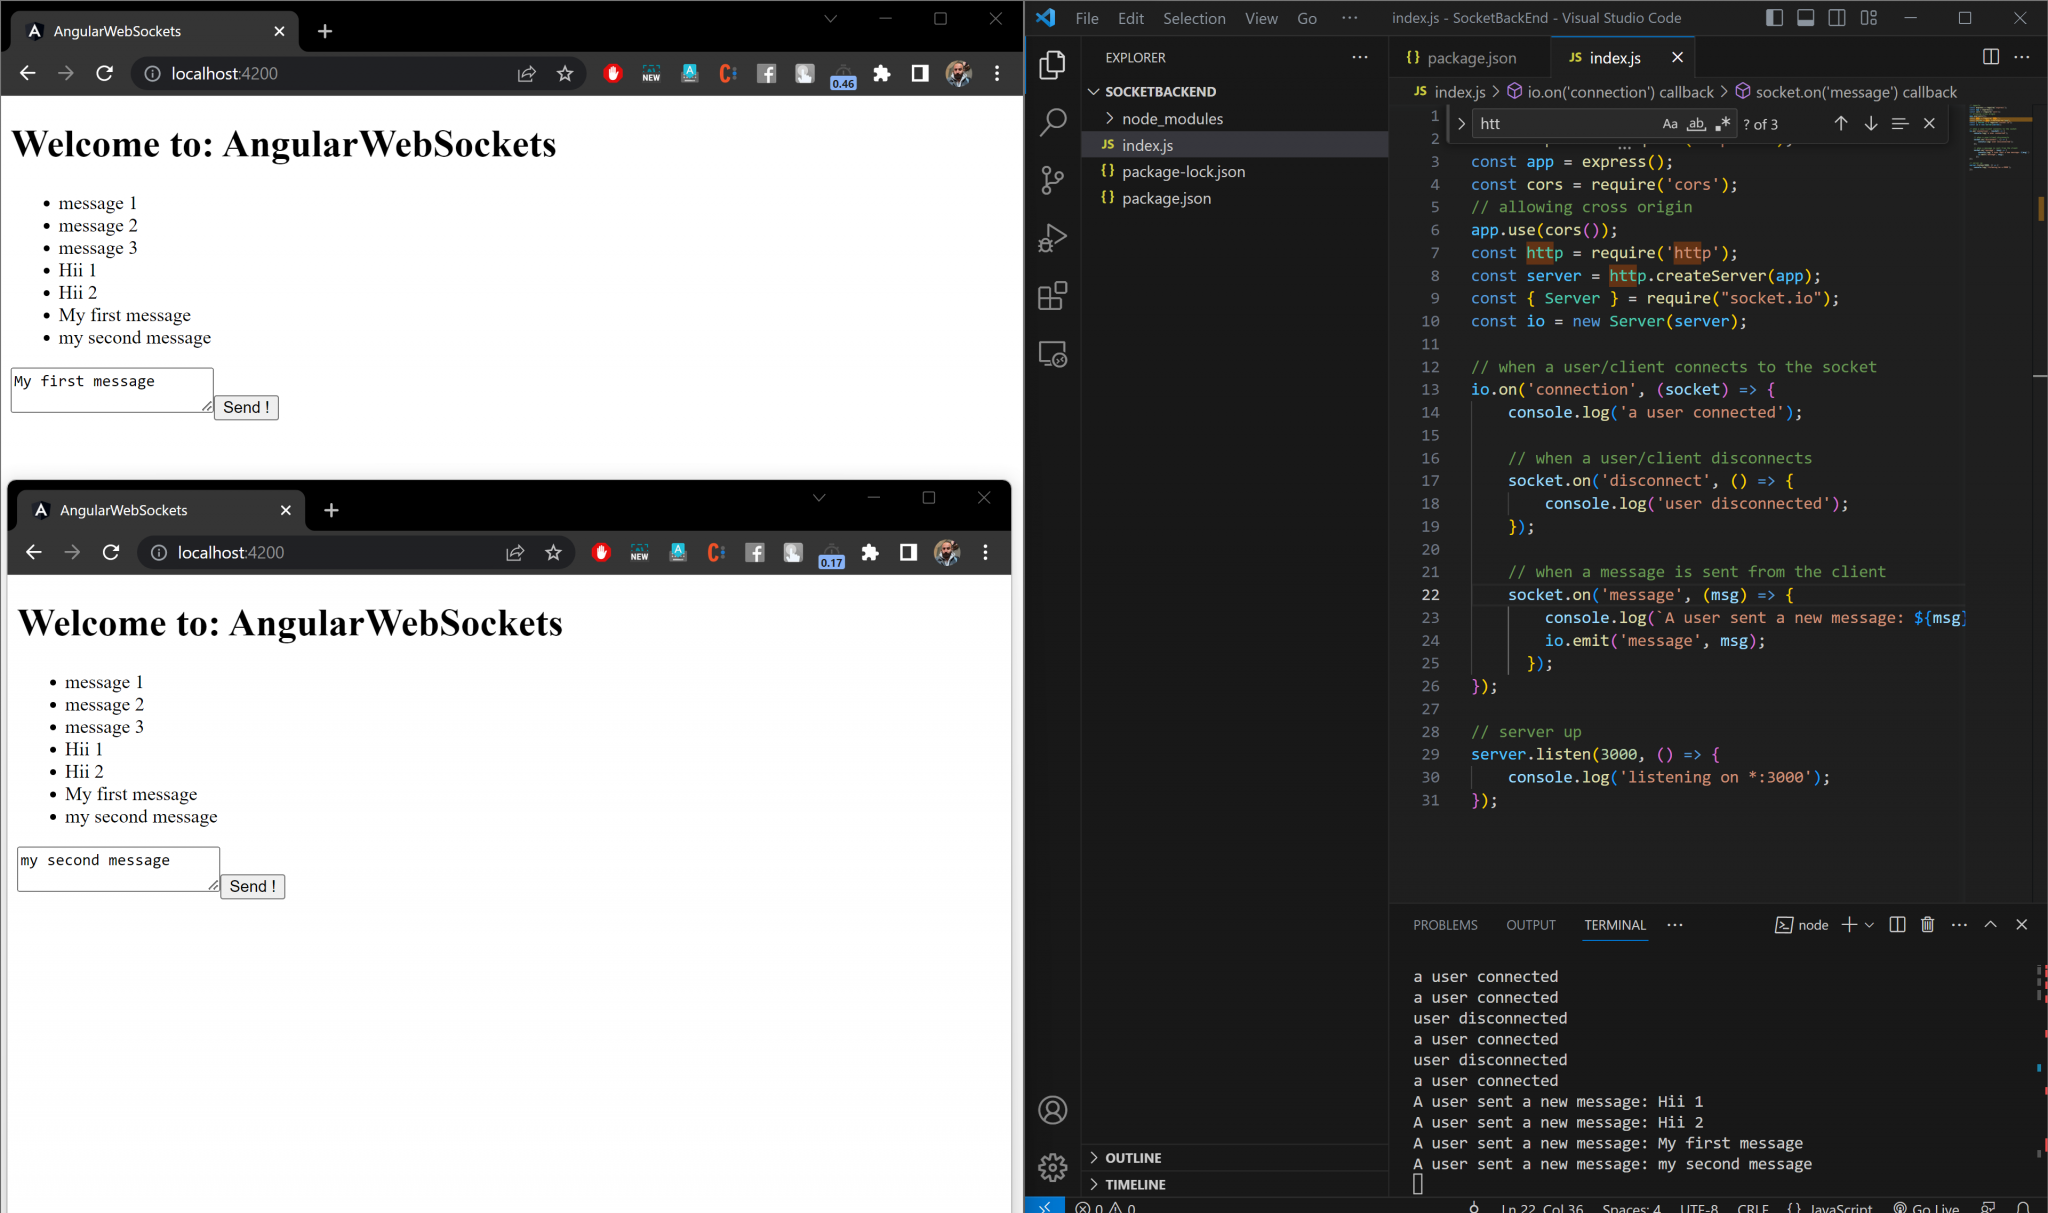
Create an index.js file and add the below code to it:
// imports
const express = require('express');
const app = express();
const cors = require('cors');
// allowing cross origin
app.use(cors());
const http = require('http');
const server = http.createServer(app);
const { Server } = require("socket.io");
const io = new Server(server);

// when a user/client connects to the socket
io.on('connection', (socket) => {
    console.log('a user connected');

    // when a user/client disconnects
    socket.on('disconnect', () => {
        console.log('user disconnected');
    });

    // when a message is sent from the client
    socket.on('message', (msg) => {
        console.log(`A user sent a new message: ${msg}`)
        io.emit('message', msg);
      });
});

// server up
server.listen(3000, () => {
    console.log('listening on *:3000');
});
To run it, use `$ node index.js`
What about the Frontend?
Now, we need to install socket io client library to our Angular App:
`$ npm i socket.io-client`
Then, we will create a Socket instance, connect it to our backend socket server which is `ws://localhost:3000, listen to the `message` event, and push the returning message to our messages array.
app.component.ts
import { Component } from '@angular/core';
import { io } from 'socket.io-client';

@Component({
  selector: 'app-root',
  templateUrl: './app.component.html',
  styleUrls: ['./app.component.css']
})
export class AppComponent {
  title = 'AngularWebSockets';
  myMessage: string = '';
  messages: string[] = ['message 1', 'message 2', 'message 3'];
  socket: any;

  constructor() {
    this.socket = io("ws://localhost:3000");
    this.socket.on("message", (message: any) => {
      this.messages.push(message);
    });
  }

  send(message: string) {
    this.socket.emit('message', message);
  }
}
And now, we have a working simple with bad UI chat app:
It took me some time in the past to find out on how to make it work with Angular using Vanilla JS, ofcourse there’re a lot of Socket Client wrappers out there for Angular, but I just don’t like them and I prefer using the vanilla js one 🤭😎😎
Repo
You will find all the code in here in that repo
https://github.com/JosephSKh/AngularWebSockets
As always, hope it was beneficial and you could follow it simply and to use it as a starting point for your great ideas.
and if not, here’s an idea potato